| Delphi Clinic | C++Builder Gate | Training & Consultancy | Delphi Notes Weblog | Dr.Bob's Webshop |
| Delphi Clinic | C++Builder Gate | Training & Consultancy | Delphi Notes Weblog | Dr.Bob's Webshop |
| |||||||
 I have been working on an BizSnap chapter for the Kylix Developer's Guide - adding more coverage of Kylix 2 to this book.
The BizSnap chapter will be published on my website (in six weekly parts), covering XML Document Programming and Web Services support.
3. XML Mapping Tool
The last example in the previous section must have felt a bit like using a dataset and/or data-aware controls, where you could navigate through the items of an XML document.
If you liked that, you're in for more enjoyment, because you'll now start to use the XML Mapping Tool (or XML Mapper for short).
You can find it in the Tools menu of the Kylix IDE, as well as a separate icon in the Borland Kylix 2 Program Group.
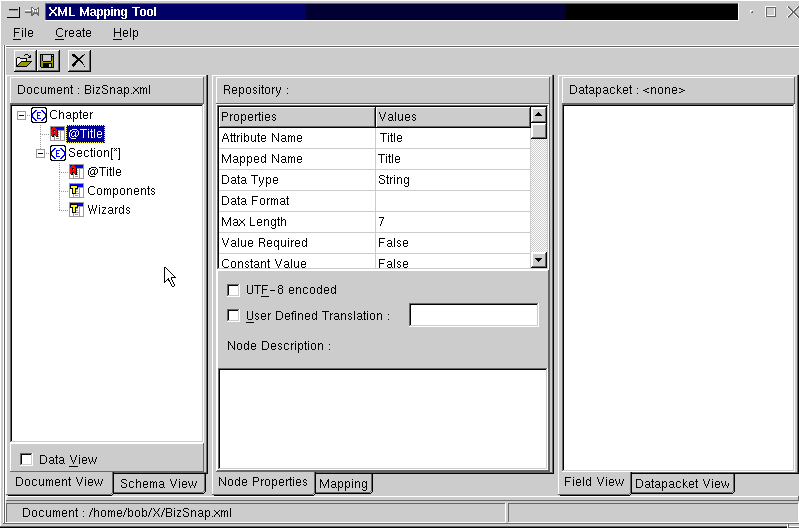
Whichever way you use to start it, you can load the BizSnap.xml file in it, and it will display a treeview with the list of XML nodes.
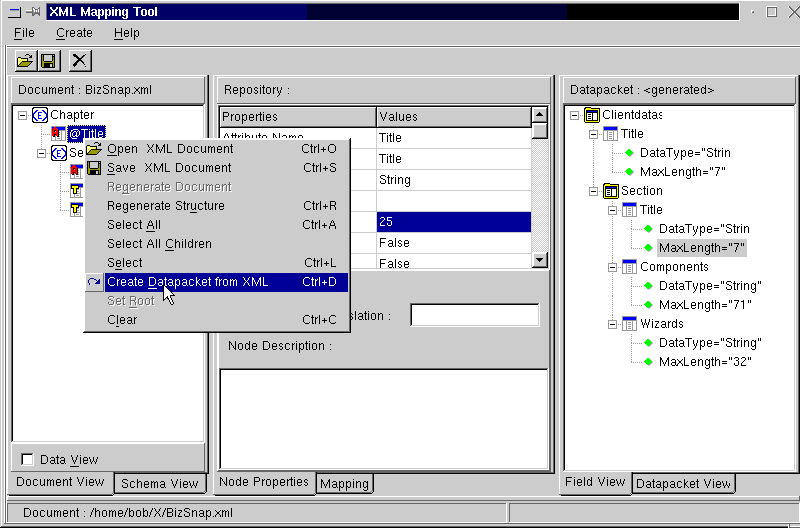
The XML Mapper is divided into three areas.
On the left side you have the XML document, displayed in a treeview.
You can also enable the Data View (which will display the actual contents of the XML nodes) and switch to the Schema view to see the generated DTD as well as the XML Schema (you can even save the generated XML Schema if you need one).
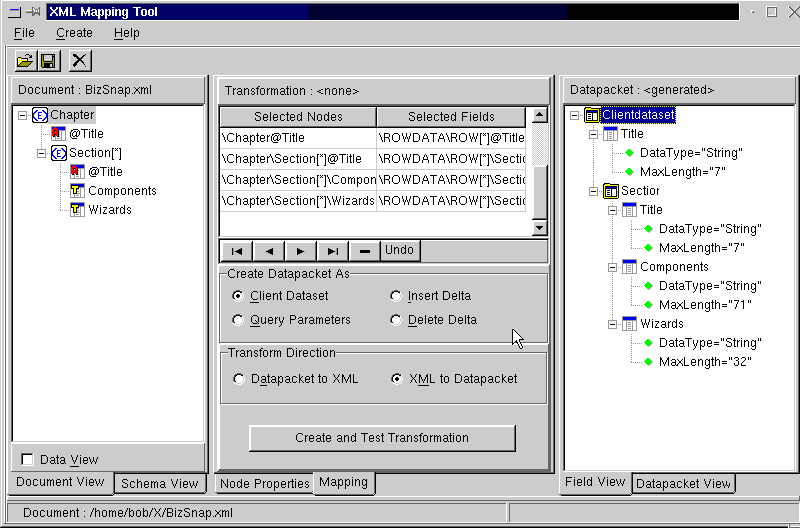
The right side will show the transformed (generated) dataset, that you'll see in a moment.
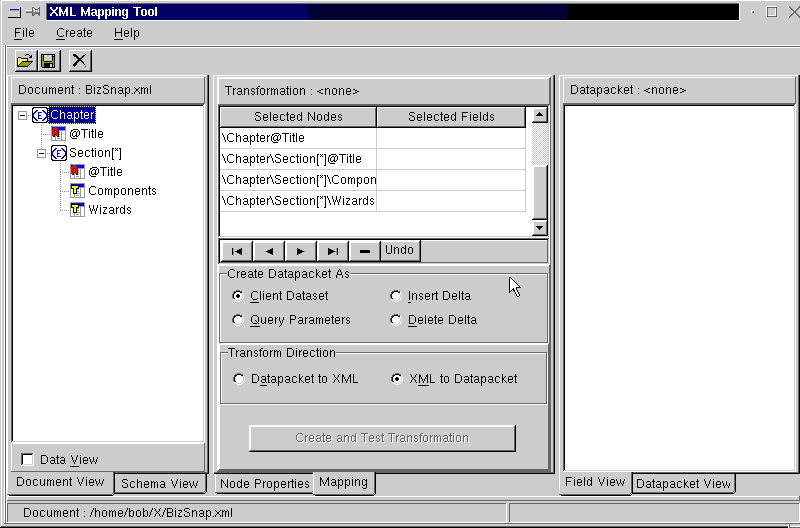
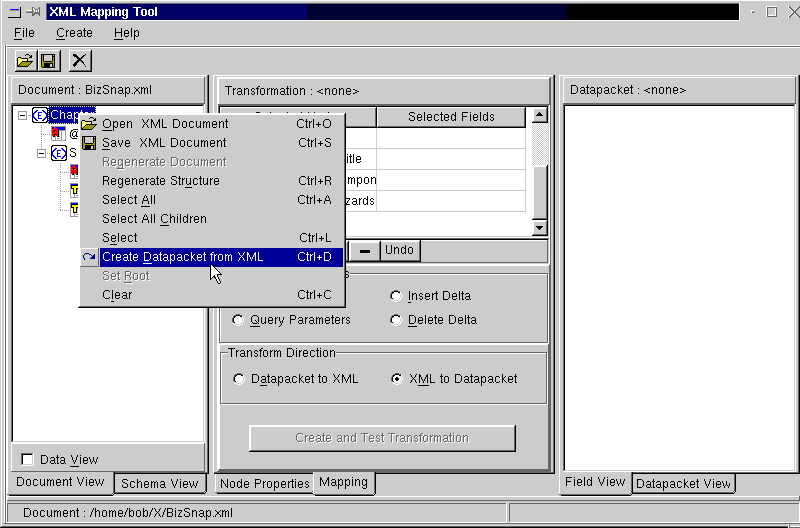
And in the middle you can set some options, make some modifications, and so on.
In Figure 7, you can see the Node Options for the Title attribute of the Chapter node.
Note the value for Max Length, which is based on the actual values present in the XML Document (in this case only the chapter title "BizSnap" which is indeed 7 characters long).
Similarly, the Max Length for the Title of the Section node is 25, and the Max Length for Components and Wizards is 71 and 32 respectively.
Transforming
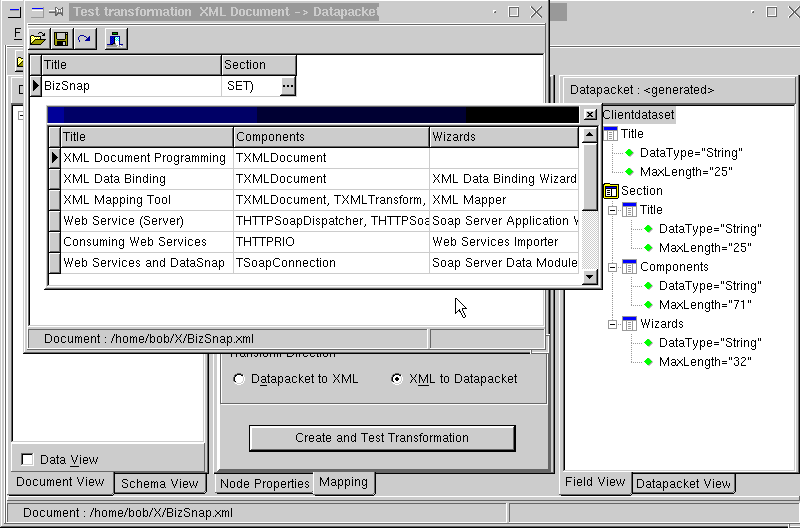
Armed with the BizSnap.xml file and the two ToDp.xtr and ToXml.xtr transformation information files, you can now convert the XML document to a dataset and back.
You can use the same TXMLDocument component, pointing to the BizSnap.xml file.
But now you should use the Transform components from the Data Access tab of the Component Palette.
From left to right, you have the TXMLTransform, TXMLTransformProvider, and TXMLTransformClient component.
The TXMLTransform can be used to transform an XML document into a datapacket or back.
The TXMLTransformProvider can be used to transform an XML document into a data packet that is "provided" to a TClientDataSet (or a Delphi TXMLBroker component) component.
It can be exported in a DataSnap application, as I'll show in the last section of this chapter.
Finally, the TXMLTransformClient component converts the data(set) from a TDataSetProvider back into an XML document.
Transformation Demonstration
To demonstrate this transformation process, start a new application and drop a TXMLTransformProvider component from the Data Access tab on the main form.
Set the TransformationFile subproperty of the TransformRead property to the ToDp.xtr transformation file, which is used when XML information is read so it can be transformed into a dataset data packet, which will be provided to a receiving TClientDataSet component.
If you also want to update the XML document again, you must set the TransformationFile subproperty of the TransformWrite property to the ToXml.xtr transformation file, which is used when the connecting TClientDataSet calls the ApplyUpdates method back through the TXMLTransformProvider all the way to the XML document.
Apart from the transformation information, you should make sure to set the XMLDataFile property to the BizSnap.xml document itself.
After you've done this, you can drop a TClientDataSet component on the main form as well, call it cdsChapter, and point its ProviderName property to the TXMLTransformProvider component.
You can open cdsChapter, which will request data from the XMLTransformProvider and as a side effect start the XML transformation.
Right-click on the cdsChapter component to start the Fields Editor, and click Add All Fields to create a persistent Title field as well as the nested dataset Section.
Now, drop another TClientDataSet component, and call it cdsSection.
Obviously, this one will be used to connect to the nested dataset Section, so make sure to assign the DataSetField property to the cdsChapterSection field.
To see the transformed data, drop two TDataSource components (one for each TClientDataSet component), a TDBEdit (for the Title field of cdsChapter) and a TDBGrid (for the entire cdsSection).
You can now use this application to browse through the grid as if you were indeed browsing through a regular dataset.
If you make changes to the data, you can call the ApplyUpdates methods of the (master) ClientDataSet cdsChapter to apply the updates back to the original XML document (via the TXMLTransformProvider component, hence the need for the transformation back to an XML document).
A good technique is to update the XML document as soon as a change is made in the cdsChapter, which can be done in the OnAfterPost event handler of the main cdsChapter as follows:
  procedure TForm1.CdsChapterAfterPost(DataSet: TDataSet);
  begin
    (DataSet as TClientDataSet).ApplyUpdates(0)
  end;
Note that you are probably the only user of the XML document, so we don't have to concern ourselves with multi-user issues and hence ApplyUpdates can have an argument value of 0 (see the DataSnap chapter for more details on ApplyUpdates).
Next Time, Dr.Bob says...
In the next section, we'll start our coverage of SOAP when we build our first Web Service "engine" using Kylix 2 Enterprise.
All this and more next week, so stay tuned...