| Delphi Clinic | C++Builder Gate | Training & Consultancy | Delphi Notes Weblog | Dr.Bob's Webshop |
| Delphi Clinic | C++Builder Gate | Training & Consultancy | Delphi Notes Weblog | Dr.Bob's Webshop |
| ||||||

Delphi 2005's DataSync and DataHub in a Remote Setting
and how to pass SQL query parameters from the client to the .NET Remoting server
Those of you who attended my Delphi 2005 Database Development masterclass at the end of November 2004 in London (organised by the UK Developers' Group) may remember a question from the audience that I was unable to answer at the time: using DataSync and DataHub in combination with RemoteServer and RemoteConnection (i.e. in a multi-tier configuration), how do you pass parameters from a .NET Remoting Client to an SQL query running on the .NET Remoting Server? This article will answer the question, and also describe in a bit more detail how you can build multi-tier applications with Delphi 2005 for .NET.
.NET Remoting Server
Let's start with the .NET Remoting Server part of the application.
For this, we need Delphi 2005 and not only the new DataSync and DataHub components, but also the RemoteServer and RemoteConnection components.At this time, a .NET Remoting Server application must be a WinForms application, so start a new Windows Forms Application for Delphi for .NET.Save the WinForm in file ServerForm.pas and the project itself in DGServer.bdsproj.
It doesn't really matter which database and table we use, but since InterBase 7.5 with the Employee sample database is included with Delphi 2005, let's use that one.Click on the Data Explorer tab, and open the Interbase provider node.If you haven't configured an InterBase connection node to point to the Employee.gdb database, then you can do so my right-clicking on the IBConn1 connection node selecting "Modify Connection", or by adding a new InterBase connection first and then modifying the new connection.
In both cases, the InterBase Connection dialog should point to the location of the Employee.gdb file in the database property, with the username (sysdba) and password (masterkey) also specified.Note that if you don't use Local Interbase, you have to prefix the database file location with a prefix of the machine(name) where the server is running, followed by a colon.If that's the same machine, you can use localhost:
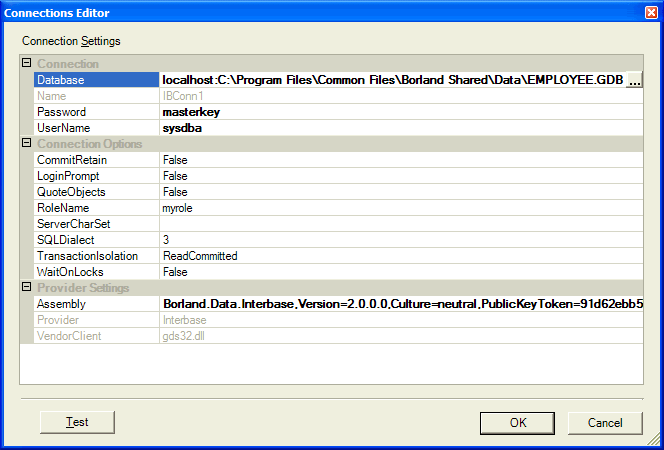
You can click on the Test button to verify that a successful connection can be made to the Employee database.Then, click on OK to close the Connections Editor.Open the Tables node for the connection, and view the list of InterBase tables.Among them is the EMPLOYEE table.This is the one that I want to use, so click on the EMPLOYEE table in the Data Explorer, and drag it to your WinForm.Once you drop it, two new components will appear in the non-visual component area of the WinForms Designer: a BdpConnection and a BdpDataAdapter component.
If you select the BdpDataAdapter component and click on the Configure Data Adapter link at the bottom of the Object Inspector.That will pop-up the Data Adapter Configuration dialog, where you can view the Select command, and uncheck the Insert, Delete and Delete commands (we won't need them at this time).After you've unchecked these, click on the Generate SQL button to expand the SELECT command to the following full SQL statement (listing all fields, instead of simply a *):
  SELECT EMP_NO, FIRST_NAME, LAST_NAME, PHONE_EXT, HIRE_DATE, DEPT_NO,
    JOB_CODE, JOB_GRADE, JOB_COUNTRY, SALARY, FULL_NAME FROM EMPLOYEE
We can now add the “WHERE EMP_NO = ? “ part the SELECT statement (note that it’s not a good idea to press enter (and put CR/LF pairs) in the SQL Window – just add to the current SQL line and allow the dialog to automatically wrap the SQL command.If you do want to press enter, make sure you add a space just before the CR/LF pair (just in case).
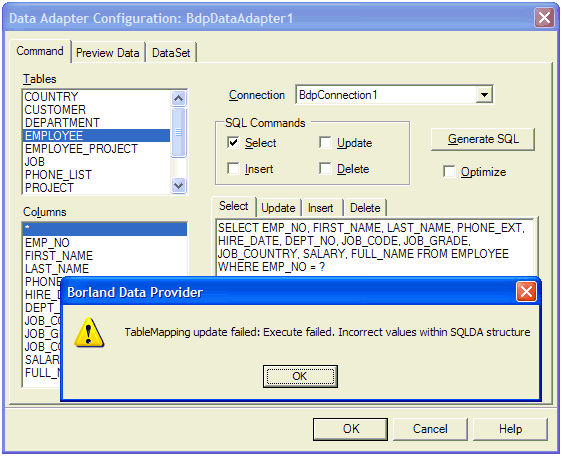
Just ignore the error, and continue.
The SQL command that we have specified contains an unnamed parameter (Delphi 2005 doesn't support named parameters at this time), and we have to specify some parameter options.
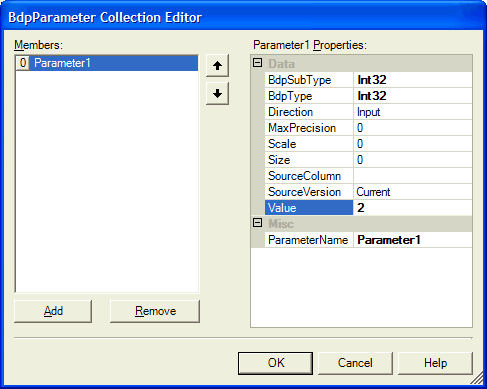
Double-click on the Parameters sub-property of the SelectCommand property, which will bring up the BdpParameters Collection Editor dialog.Here, we need to add one parameter, specify that it's of BdpType and BdpSubType Int32 and enter a default value, say 2.The name doesn't matter, unless you want to refer to the parameter in the collection by name later.
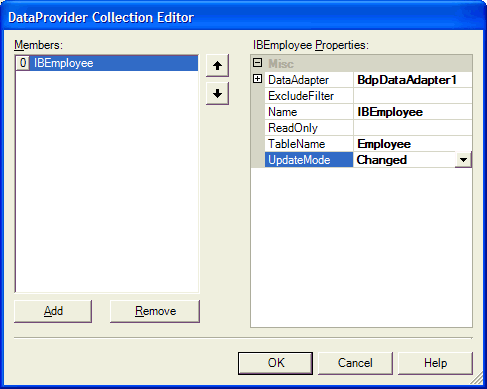
With this BdpDataAdapter in place, it's time to add the new DataSync component. From the Borland Data Provider category of the Tool Palette, place a DataSync component in the non-visual component area of the WinForm.The DataSync will collect Data Adapters in its Providers property.Double-click on the Providers property of the DataSync component to start the DataProvider Collection Editor.Here, we should add a new DataProvider, called IBEmployee, pointing to the BdpDataAdapter (which contains the WHERE clause with parameter).As TableName for this DataProvider, we can specify Employee, and we can set the UpdateMode to Changed.This last option ensures that the generated Update statement will only contain the changed columns when updates are send back to the server.This leads to reduced bandwidth usage, since you don't have to pass all (unchanged) field values.
Close the dialog when done.
So far so good (except for the SQLDA error message we got earlier, but I told you to ignore that).Now it's time to turn the application into a .NET Remoting server application.For that, we need a RemoteServer component - also from the Borland Data Provider category of the Tool Palette.
Place a RemoteServer component on the non-visual component area of the WinForms Designer.Point its DataSync property to the DataSync component.By default the ChannelType is set to Http, which results in the Formatter being Soap.If you change the ChannelType to Tcp, then the Formatter will change to Binary automatically (there is no other way to change the Formatter).You can change the URI if you wish, although you should remember the new value.By default it says RemoteServer1, which has to be used by the client in order to connect to it.I’ve changed it to RemoteServerDG for our example.More important at this time, however, is to set the AutoStart property to True, so the Remote Server application will start to wait for incoming requests as soon as you start the application.
Now, save and compile the DGServer project.In order to allow the client to connect to it, the DGServer has to be up-and-running, to make sure it's actually running when you continue with the next part of this article.
.NET Remoting Client
You can either start a new project from scratch, or add a new project to the project group that also contains the DGServer project.
I personally prefer the latter approach, as it allows me to quickly switch from the client to the server project and back.Another nice approach is to build the .NET Remoting client application on a different machine – one from which you can actually make the (network) connection to the .NET Remoting server, of course.
Anyway, once you’ve created a new project, save the WinForm in ClientForm.pas, and the new project in DGClient.bdsproj.
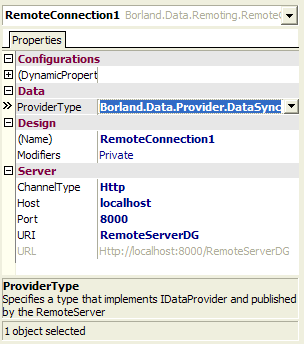
Now, place a RemoteConnection component in the non-visual component area of the WinForms Designer.Set its URI property to the URI of the RemoteServer, which was RemoteServerDG in my case.Also make sure that the Port and ChannelType property have the same value as in the corresponding .NET Remoting server application.
In order to check if everything is setup right, and to make the actual connection, open the drop-down combobox for the ProviderType property and select the (only choice) Borland.Data.Provider.DataSync type.If you don’t get anything to select, or if you get an error message, then obviously some of the properties (URI, Port or ChannelType are set incorrectly, or the .NET Remoting server is not running or cannot be reached somehow – don’t forget to check your firewall).
Place a DataHub component, and connect its DataPort property to the RemoteConnection component.
Do not place a DataSet on the WinForm, yet, since we’ll create that one dynamically.
For the user interface, place a TextBox, a Button and a DataGrid component on the Form.Clear the contents of the TextBox, and set the Text property of the Button to Select.
In the Click event handler for the Button, we’ll create a DataSet, connect it to the DataHub, activate the DataHub, send the contents of the TextBox as parameter value over the .NET Remoting connection, refresh the DataHub and finally display the result of the query in the DataGrid.This is done in code as follows:
  procedure TWinForm1.Button1_Click(sender: System.Object; e: System.EventArgs);
  var
    DataSet1: DataSet;
  begin
    DataHub1.Active := False;
    DataHub1.DataSet := nil;
    DataGrid1.DataSource := nil;
    DataGrid1.DataMember := '';

    DataSet1 := DataSet.Create;
    DataHub1.DataSet := DataSet1;

    DataHub1.Active := True;
    (RemoteConnection1.Providers[0].DataAdapter as BdpDataAdapter).
      SelectCommand.Parameters[0].Value := TextBox1.Text;
    DataHub1.Refresh;
    DataGrid1.DataSource := DataSet1;
    DataGrid1.DataMember := 'Employee';
  end;
The biggest trick here is that I’m using the Providers property of the RemoteConnection component as a reflection of the DataProviders at the .NET Remoting server side.For this to work, the DataHub must be active, by the way, which is why we need to set Active to True before we can access the contents of the Providers property.We can then select the DataAdapter we need (the first one), and from that one the SelectCommand, filling the value of the first parameter with the contents of the TextBox.One big line of code, but it does the job!
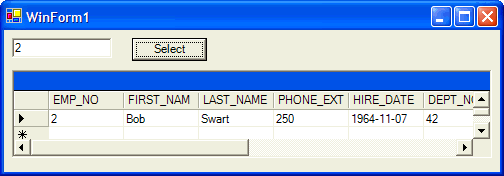
Each time we enter a new value, a new DataSet is created and a new Parameter value is passed on from the client to the server, and when the DataHub is refreshed the DataSet is filled with a new DataTable for the record that we wanted to select.
Summary
In this article, I have used the DataSync and DataHub in combination with RemoteServer and RemoteConnection (i.e. in a multi-tier configuration), and demonstrated how to you pass parameters from a .NET Remoting Client to an SQL query running on the .NET Remoting Server.