| Delphi Clinic | C++Builder Gate | Training & Consultancy | Delphi Notes Weblog | Dr.Bob's Webshop |
| Delphi Clinic | C++Builder Gate | Training & Consultancy | Delphi Notes Weblog | Dr.Bob's Webshop |
| |||||||
Team Development Features in JBuilder 4
JBuilder 4 introduces a couple of features to support multiple developers working on the same project:
This article will give an overview of these features by creating a project, using the built-in revision control on it, and finally adding the project to a CVS repository.
Project Files in JBuilder
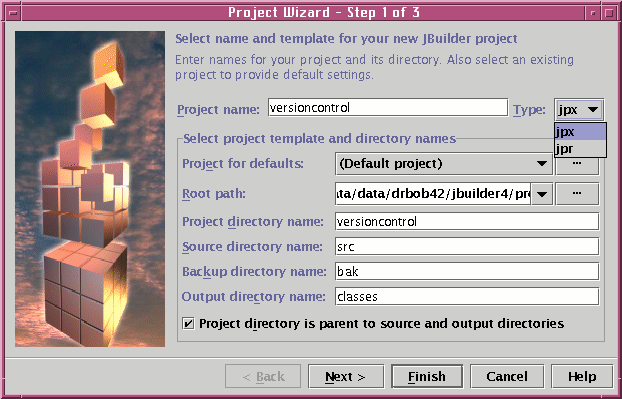
When using the familiar menu options File|New Project to create a new project, the Project Wizard that comes up already looks totally different than the JBuilder 3.5 one.
In fact, only the bitmap on the left is the same.
The first thing we notice is the option to choose between
jpr and jpx projects.
A jpx file is the same JBuilder project file, but formatted as an XML file.
More important is that a jpx file will be added to a CVS module when using version control.
jpx is the default format for the project file.
A nice improvement for me personally is the way the paths are now set.
The first thing I would do after creating a project was making a new directory for the project and changing the source and compile paths in the project properties to point to it.
I never used the myprojects and myclasses directories in the JBuilder installation but for tests and demos.
The Project Wizard now lets us specify a project directory, and by default makes subdirectories for the source, classes and backup files.
So no .~jav files cluttering up your source directory anymore.
The Project for defaults option will set our project settings based on the template project file we specify.
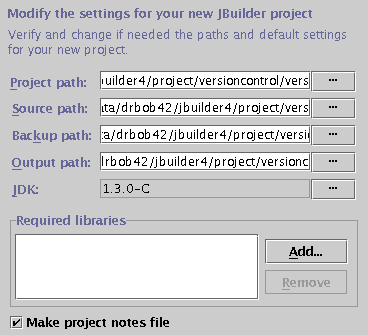
The second page of the Project Wizard lets us review the effect of our path settings. Other project properties like the JDK version and the required class libraries can be specified here. Of course these settings can still be modified through the Project Properties... menu option.
When changing the JDK version in this dialog or adding a class library to it we encounter a new feature. This new feature, meant to facilitate team development and the use of JBuilder on one system by multiple users (for example on a Unix server), is the way library and JDK paths are stored.
When changing the JDK version for example, the following dialog will appear. It seems we can define a new JDK in one of three folders: Project, User Home and JBuilder. What does all this mean?
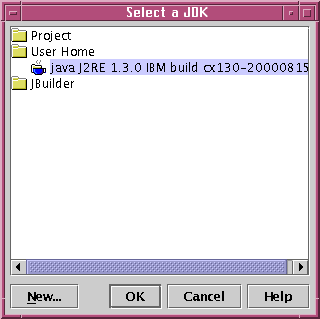
In previous versions, all default library and JDK definitions would be stored in the JBuilder directory and user-defined ones in the .jbuilder file of your home directory (in Windows that would be your Profiles folder). In JBuilder 4, you can choose where to store the definition of a library or a JDK. The options are:
The definition of the JDK used and the compiler options are stored in a .library file in exactly the same way. Library files are stored in XML format and can thus be easily edited and compared by a version control system.
The idea behind this is to simplify sharing projects by separating project files in a shared and a private part. IDE settings like the windows, watches, and breakpoints are stored in the private side, while libraries and compiler options are stored in the shared part.
While this will solve problems when sharing one JBuilder installation between several developers, team development on separate systems is another issue.
When developing in a team using version control software you now have two options: include the project files or leave them out.
You would like to have the build settings included in version control, so every developer uses the same settings to build the project.
On the other hand, when retrieving a project file from version control, we get the IDE settings of another developer, and you almost always have to change a lot of machine specific settings before your project compiles again.
This new feature solves the first of those two problems.
The remaining problem with sharing project files is caused by the path definitions.
Developers will have different paths on different drives pointing to their local copy of the projectcode or the supporting libraries.
And that is where the libraries of JBuilder come in.
As long as developers use the same name for a library, but with the path settings for the developer's machine, everything will work fine.
Let's assume we wanted to add the JavaMail API as a library to this project. Because we are sharing this computer with other users, we will store the library in our home directory.
On the second Project Wizard page, we use the Add button to add a class library to the project:
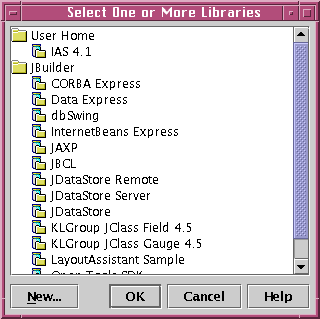
The JavaMail API is not included by default, so we hit the New button. This will bring up the following dialog:
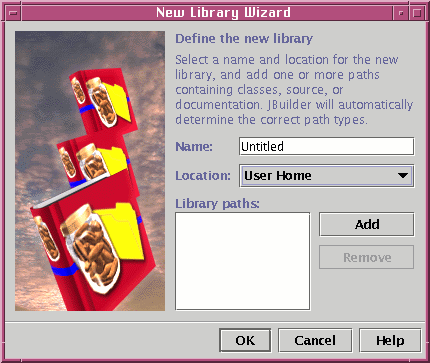
The Add button will let us browse a library path (next screenshot). Okay, I just included the next screenshot to show off the new file chooser dialog of JBuilder. Cool, huh? Notice that you can navigate right into the contents of JAR files (already in JBuilder 3.5):
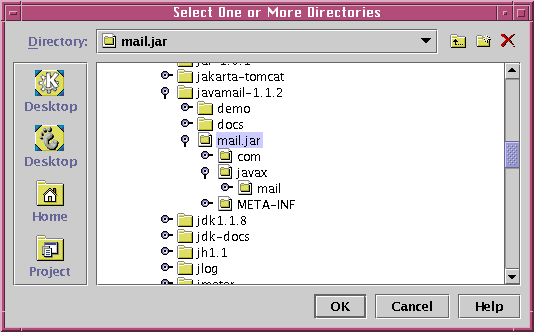
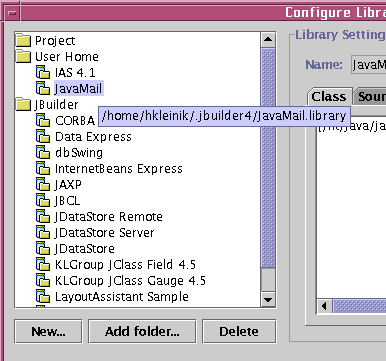
When we have specified the path to the JAR file and given the library a name, we can choose the way the library definition is stored. For this example we choose User home. And we can see that the new library has been added to the User Home section of the libraries.
When looking at the same library using the Project Properties... menu option, we can see the remaining library storage option: Project. Notice that a tooltip shows the location of the library definition:
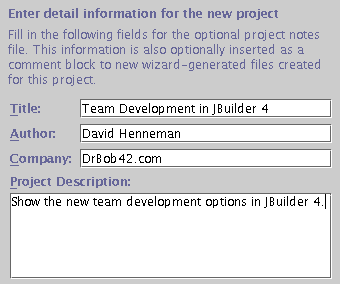
Just to wrap up the Project Wizard, here is the third and last page. Just as in JBuilder 3.5, the information you fill in here can be used for generating code comments and the about box of your application:
Built in Revision Control
In all editions, JBuilder supports a basic, but very powerful form of version control.
For this, JBuilder uses the backups it always made of your java files.
Instead of one backup with the extension ~jav, JBuilder will store multiple backups of every file with extensions java~1~, java~2~, html~1~ and so on.
Every save of the file will generate a new backup file, designated by sequential numbers.
These files are stored in the directory we specified as the backup directory (defaults to bak).
You can set the number of backups JBuilder will store in the Tools|Editor Options|Editor Backup Level:

A new History tab at the bottom of the content pane (our source code) gives you a view on the backups JBuilder made of the source file that we have opened in the content pane. Selecting it will show our source code, and an overview of the revisions that have been stored for this file:
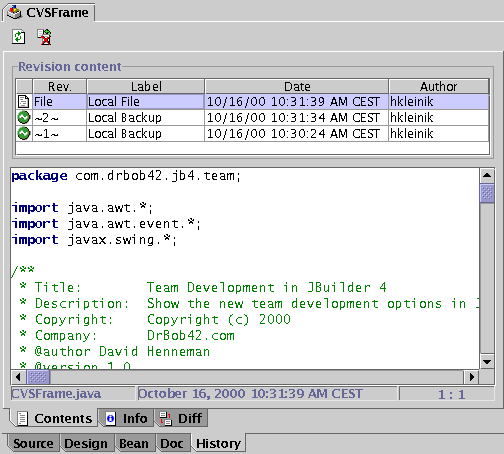
We can select a version and the source code for that version is shown. The editor is read-only, so we cannot make any changes here. But we can still copy pieces of code to the clipboard and past it in the real code editor.
The Info tab will show you nothing more, as it is not possible to add comments and labels to local backups. The Diff tab though, allows us to review the differences between the revisions. In the screenshot below we have deleted a comment and changed three lines of code between the first and current versions. As you can see, deleted are shown in red, added lines in yellow. And just to be completely clear, a plus or minus sign is displayed to the left of the code.
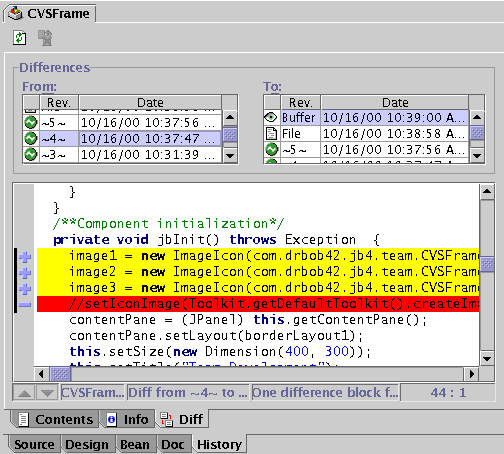
Especially handy is the option to see the difference between the contents of the (memory)buffer with the version of the file on disk. If we have just made a change, and are not sure what – for example the Visual Designer changed, you can check and then decide to save or undo!
As a new version is made with every save, and not explicitly checked in as with a proper version control system, you should be careful to rely on this feature as a version controller. After the set level of backups is reached, our older versions will be deleted. So, this is not a replacement for a real version control system. That said, it is a very cool feature, and it has saved me time already. I feel much more comfortable now to try out something new in the Visual Designer.
If you need real version control, download CVS, even if you can't afford to buy JBuilder Enterprise Edition.
There are nice GUI's available for CVS, and of course everything is freeware.
If you are developing on your own, this will probably cover your versioning needs and save you all the annoying check-ins and check-outs.
Version Control with CVS
Only in the Enterprise Edition you will have a Team Tab in Project Properties with an option CVS available:

Although the CVS menu's and toolbars are automatically installed as a JBuilder Addin, we will have to install CVS first to be able to perform CVS operations.
When we have None selected, we will have no version control system, but we will still have the default revision control shown before.
When selecting CVS, we need to specify the client settings of CVS (see below).
Basically this tells JBuilder how to contact the CVS repository.
This assumes you have first created and initialised (cvs -d <cvsroot> init) a CVS repository:
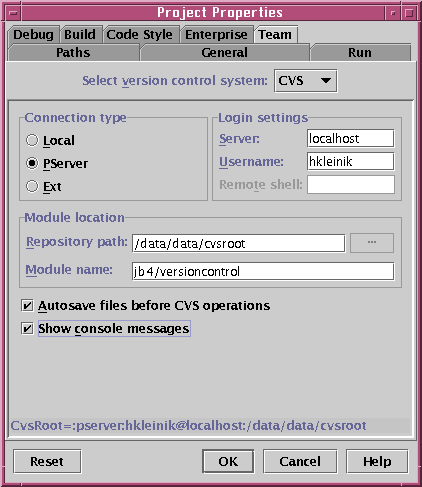
After completing this dialog, we will have one additional option available in the Team menu: CVS Project Create Module.
With this option we can create a new module in the CVS repository based on our current project.
When we select this option, you will get a password prompt and the following dialog:
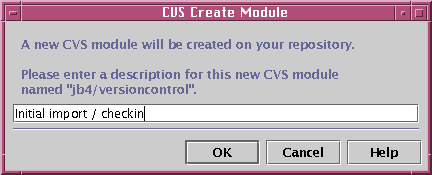
After that, JBuilder will have created a module in CVS for your project, imported all the files in this project to the new module and checked out these files from CVS to your project directory. The original files have been backed up to a directory with the extension .precvs.
Tip - If you have used CVS before you probably won't make this mistake, but I fell for it all the same: do not use cvs as a directory name in your project.
CVS reserves this name for bookkeeping.
The directory will be ignored (not imported) by CVS.
This is especially troublesome if you have named a package cvs, for example in com.drbob.cvs.
Your sourcecode will then be in a directory called cvs and not be included in CVS.
|
As the project is now checked into CVS, other developers should be able to access it now. If we close this project and create a new one, we can pretend we are that other developer. When we set the Project Properties in the same way as before (that is, pointing to the same CVS repository and the same module), we have one option available under the Team menu next to Create Module: CVS Project Checkout.
When checking out, the following dialog will be shown:

Let's add a simple method to the CVSFrame source code and commit it to the CVS repository.
We have different options of committing the source file.
We can go to the Team menu and select the option CVS Commit "CVSFrame.java"..., or right-click on the file in the Project pane and select the option CVS Commit "CVSFrame.java"... from the CVS menu.
Or we can select the option CVS Project Commit..., which allows us to commit multiple files at once.
This last option also contains a nice feature, which allows us to look at the differences between the source on our local machine and the version in the CVS repository:
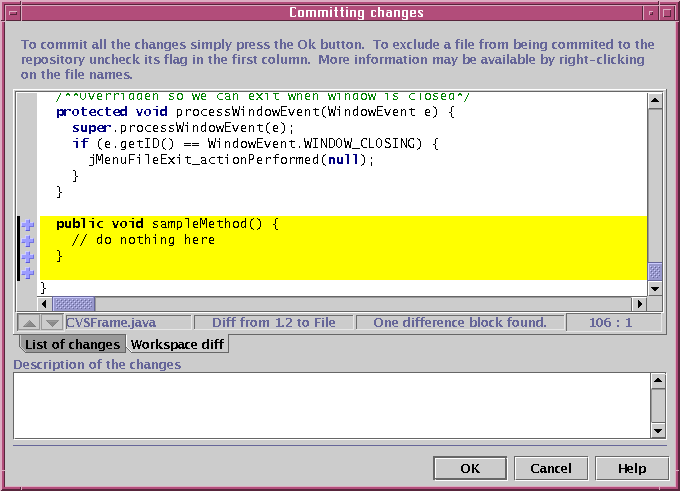
We can type a description of the change (applies to all files if we have multiple files which are changed) and then commit the file to the CVS repository.
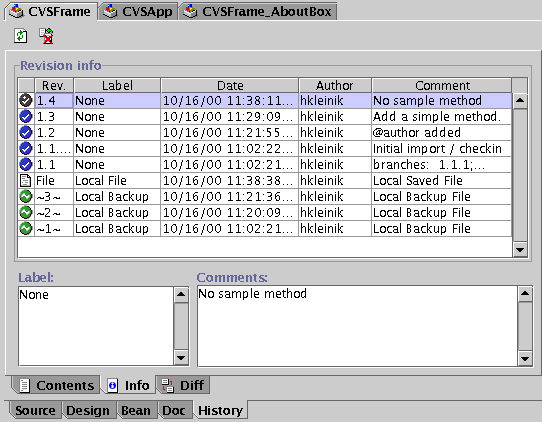
The History tab now also contains the CVS revisions, aside the local backup files. Commit comments are displayed and we can revert back to previous revisions found in the CVS repository. We can sort on the different columns by clicking on the table header:
Finally we will take a look at what happens if we have a conflict in a source code file.
Normally CVS will try to merge a local file with the file in the repository if a change has occurred.
But sometimes CVS doesn't know what to do and let's us decide what needs to be done.
Suppose we have added a data member to the CVSFrame.java file with the name sample of type String.
But someone else has committed a source file in the repository with a new data member with the same name, but of type Object.
When we want to commit our source file, we get a conflict.
JBuilder will inform us that we have a conflict and the section in our source code is indicated as a merge problem.
JBuilder inserts a special JavaDoc tag:
@merge:
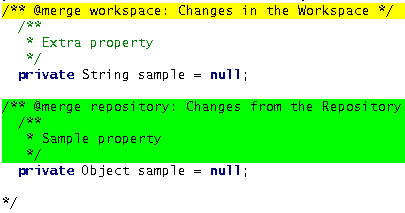
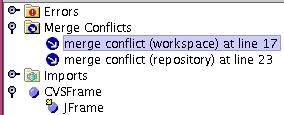
We can jump right to the section in the code with the conflict. We must use our own judgement to resolve this conflict. For example we can ask the other developer what is best. We change the source code accordingly and then we can commit the source file safely to the CVS repository.
The integration of CVS in JBuilder 4 Enterprise Edition, makes it very easy to use this version control application. All daily tasks, like updating and committing files, are done right from the IDE. Especially the options to view differences in revisions and the option to solve merge conflicts are nice. Combined with the new project files it is easy to create Java applications with a team of developers using JBuilder 4.